GIFs have become increasingly popular in recent years, and for good reason. They add an element of fun and entertainment to our social media feeds and messaging apps. But have you ever wondered how to create a GIF from an MP4 video? In this post, I’ll show you ALL the different methods to convert an MP4 to a high-quality GIF using Photoshop.
keep in mind that these methods work also for other video formats that are supported by Adobe photoshop like MOV (QuickTime), AVI, FLV, and more.
Basic Method to Make a GIF From an MP4 Video in Photoshop
This is the easiest way to convert a video file to GIF inside Photoshop. All you need to do is follow these steps:
Step 1
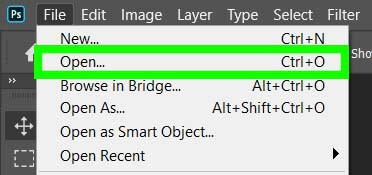
Go to File Menu > Open, or use the keyboard shortcut CTRL + O (win)/ Cmd + O (mac), then choose the video you want to convert and click the Open Button.
Find out 5 other different methods to open a video in Photoshop Here.
Step 2
After you imported the video to Photoshop, go to file > save as, then choose the .GIF option in the format section and hit Save.


Step 3
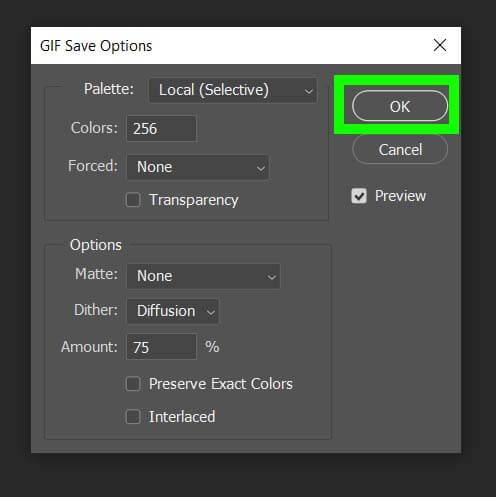
When the “GIF Save Options” dialog box will show up, modify the settings as you like and click OK.
Advanced Method to Convert MP4 to Animated GIF in Photoshop
If you want to have more control over your GIF file, follow the steps below
1. Go to File > Import > Video Frames to Layers.

2. Select the MP4 video file that you want to convert and click “Open”
3. In the “Import Video To Layers” dialog box you can import the full video by choosing the “From Beginning To End” option.
On the other hand, if you want to import just a portion of the video, go to “Selected Range Only” and start trimming your video using the trim controls below the clip.
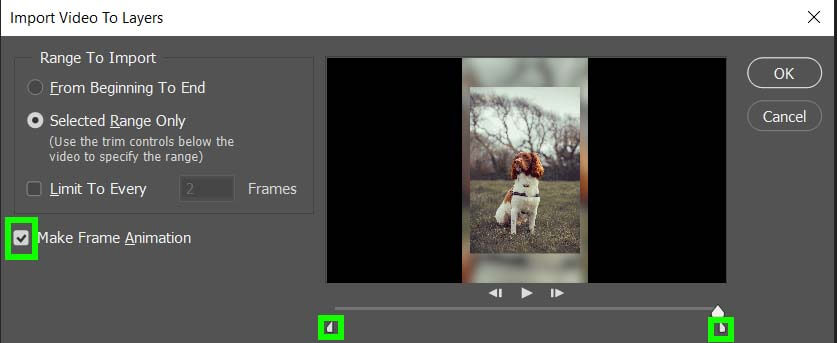
Then choose the frame rate (the value should range between 2 and 500). Finally, turn on the checkbox next to “Make Frame Animation” and hit OK.
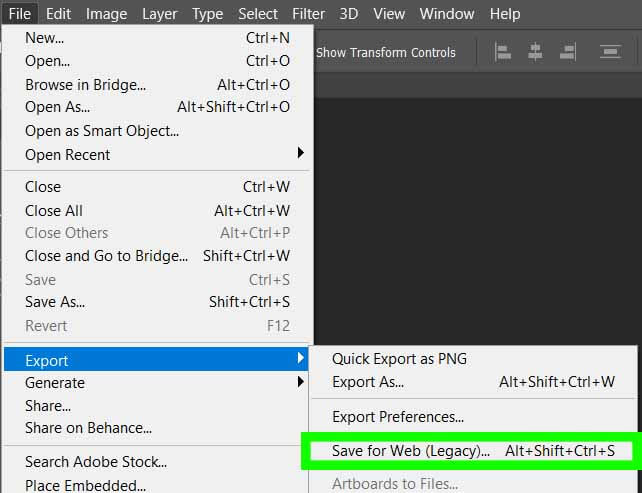
4. After you’ve adjusted the settings, it’s time to export the GIF by going to the File menu > Export > Save for Web (Legacy). Or use the shortcut Alt + Shift + Ctrl + S (win) / Shift + Option + Cmd + S (mac).
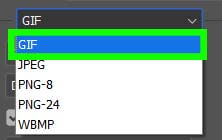
5. In the dialog box, choose GIF as the file format.
6. Adjust the settings as needed, such as the image size, color reduction, and quality.
7. Click Save, then select “Images Only” from the format dropdown Menu and hit Save to export the GIF.

Conclusion
Creating a GIF from MP4 videos may seem complicated, but using Photoshop as a GIF converter, it’s actually quite simple. Follow the steps outlined in this post, and you’ll be able to create your own GIFs in no time.
I hope this post has been helpful in teaching you how to convert an MP4 video to GIF in Adobe Photoshop. If you have any questions or comments, feel free to leave them below!
SHARE
